Showing posts with label A Piece of Ewe. Show all posts

Wednesday, March 9, 2016

Knitting Needles, double pointed needles and more even more needles

Knitting Needles, double pointed needles and even more needles

For every type of yarn, there is a needle and here are a few tips, pun intended.

The thicker the yarn, the larger the needles should be.  One of the latest fads in knitting is using HUGE needles to create a chunky project quickly.  Size 50 needles or eve size 75 needles will give you a large knit and project with very few stitches. 


But size isn't all that matters.  The sharpness of the tip of the needle will help or hinder you as you move through your project.   A knitting needle with a very sharp tip should be used for single or double ply yarns.  Yarns which are smooth and silky feeling;  a sharp needle will reduce the chances of splitting and fraying the yarn and will keep your finished project smooth and silky also. 

A needle with a blunt tip is idea for wools, wool blends and fun yarns; yarns with fur, loops and glitter.  The blunt needle will pass smoothly through the frayed pieces and loops without altering the unique texture of the yarn.

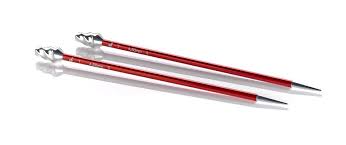
 And finally; finials.  I love these needles; they are beautiful but personally, I have a very hard time with them.  My knitting travels with me, so stitches fall off these needles in my bag and I spend a great deal of time picking up what I've dropped.  I love to use these needles at home on a non-traveling project. 

So for me, a needle with a large finial or nob on the end which prevents my stitches from slipping off the back is ideal.

As to the difference between wood and metal that is completely a personal preference.  I use both and love both but do change them up depending on the project and the weather.  In the summer, I prefer metal needles because I live in the Midwest where it is warm and humid and that weather combined with the oils, heat and pressure of my hands makes my wooden needles very pliable.  This also makes them ideal for me for the winter.

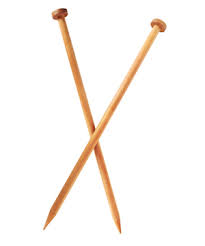
The biggest deciding factor for me in choosing a wood or metal needle is if I will be doing a decorative stitch or not.  I prefer to do cables and decorative stitches on metal needles to aid with the resistance in pulling stitches through, but again, this is my personal preference.

If you have any questions, need an exotic or HUGE set of needles or just want to try out a few different needles to see how they feel and which you prefer, hit your neighborhood yarn store; they will have everything you need.  I once needed sizes 17 and 19 circular needles for a project- I thought it was a typo or a conversation error- I didn't even know those odd sizes existed until I went to my shop A Piece of Ewe. 

So, find a needle you like, a yarn you love, and enjoy!


Friday, February 5, 2016

Teddy Bears

Teddy Bears

Teddy bears are one of the most iconic and recognizable of all toys.  Created simultaneously by Morris Michtom (in the US) and Richard Steiff (in Germany), these bears first appeared in the early 20th century around 1903.  Michtom's bear was inspired by Theodore "Teddy" Roosevelt, hence the name Teddy Bears.

Many people don't knit teddy bears due to the piece work with each limb, head, body, and ears being made separately.  But when made, or better yet felted, knit teddy bears are wonderful to snuggle.

If you're looking for a project of small pieces that can be done quickly or on the go such as when riding in the car or bus, knitting a teddy bear may be for you.  You can make a teddy by knitting in the round or knitting flat and sewing the seams.

This is a teddy bear I made years ago for a friend who was eagerly awaiting the arrival of her first grandchild.  No one knew if the baby was a boy or girl so I chose a neutral color in a super soft wool blend.  If you're not sure what kind of yarn to use for your teddy bear, stop into your favorite yarn store for help selecting the perfect yarn.  Also, they can help if you get stuck.
 
I'm told this bear is well loved and gets softer day by day with each hug

Friday, November 13, 2015

Knitting Mittens


Mittens~ a cool weather necessity and great fun to make.

Once the weather turns cool, I can't wait to pull out my hats, scarves and mitten...   Mittens are cousins to socks and just as the left sock always seems to be lost somewhere in the process of laundry, at least one mitten goes missing each year as well.


But no worries, mittens are easy, much easier than socks to make, and great fun.  And thankfully, just as the teen trend is not to wear matching socks, you don't have to wear matching mittens either.

These are a pair of mittens I made last night.  Yep, they're that easy.  The cuffs are a simple 2 X 2 rib (K2, P2) followed by stockinette stitch.  Don't worry about the thumb; follow the directions and you'll be just fine.  You'll slip these stitches off onto either a stitch holder or piece of scrap yarn and knit around them.  Once you've finished with the mitten, you'll come back and knit the stitches for the thumb.

But, if you are really afraid of the thumb; skip it.  Baby mittens are made without thumbs; you never want to give them gripping power before their ready and besides, have you seen the size of those tiny thumbs?

Because mittens are so easy to do, knitting wise, it's a great time to play with yarn.  Go to your favorite yarn shop, mine is A Piece of Ewe.  A Piece of Ewe is in Bay City, Michigan and available on the web at www.apieceofewe.com.  Susan and her team are fantastic and do mail orders as well.  But hit your favorite yarn shop and "pet" yarns.  Which feel good?  Which are soft and luxurious?  Which are so full of color they make you smile?  Those are the yarns you should be using for mittens.

The most important thing to remember is to have fun!  After you've made one, all you do it repeat.  And this is the fun part~ you can repeat in the same color or pattern, or start over again in something completely different!  Just remember to be consistent with sizes and you'll never be frustrated over losing ONE mitten again.

Pattern:
Children s:
Medium: (Women's small, youth large)
Large: (Adult)

Using a set of 4 dps, cast on 40 (48, 56) stitches and join in the round.  Make K2, P2 rib for 2.5 (3, 3.5) inches.  Switch to stockinette stitch for another 1 (1.5, 2) inches.

Begin thumb gusset:  Take a deep breath, it's ok.  Knit 11, place a stitch marker, k3, place 2nd marker, knit to the end of the round.  All of the increases in stitches will happen between these two markers to make the base of the thumb.  By adding stitches, you keep the circumference of your hand and you're not "stealing" stitches for the thumb.

Increase round: Knit 11 to the marker.  Slip the marker to the right needle.  Increase one stitch.  I prefer to make a stitch by picking one up (pick up the bar of yarn between the stitch on the right needle and the stitch on the left). Tin Can Knits, another knitting blog, has a fantastic tutorial on how to add these stitches with fun illustrations.  Tin Can explains this much better than I can, so please see this post http://blog.tincanknits.com/2013/10/03/m1/ for how to pick up stitches if you need it.


Knit the 3 original stitches, make one stitch between the last stitch and the marker, just as before.  Slip marker, knit to end of round.

Next round:  knit.

Repeat these two rounds; increase round and knit round, until you have 9 (13, 17) stitches between the markers.  Once you have this many stitches, on the next knit row, instead of knitting the thumb stitches, remove the  marker and put the stitches on either a stitch holder or piece of string.

From now on, you will knit around these stitches and only work on the hand portion of the mitten.  Once the mitten is 8 (9, 10.5) inches long, begin to decrease to shape the top of the mitten.  You do this by:  K 2, K2tog, all around the mitten.  The next row, knit.  Next decrease row:  K1, K2tog, to end.  Next row knit.  Final decrease row:  K2tog all remaining stitches.

Cutting a long tail, thread the yarn through the remaining stitches and pull tight.  You can then knot this off  and pull to the inside for a nice rounded top mitten.

Returning to the thumb:  Slip the stitches from the holder or scrap yarn back onto your dps.  On the first time around the thumb, you will need to pick up three stitches in the saddles of your thumb or where your thumb meets your hand.  (If you forget this, you'll have a hole in your thumb pit).  Pick up three stitches here and knit in the round over these 12 (15, 20) stitches until the thumb is 1.5" (1.5, 2") from where you picked up your three new stitches against the body of the mitten.  Do NOT measure from the base of the thumb where you started the increases.  If you measure from here, you'll have a very short and stubby thumb which won't allow for movement and it will look silly.

Once you've reached 1.5" (2"), K2tog across all stitches.  Cut long tail and thread yarn through stitches, rounding off and binding the thumb.  Knot on the inside.

You've now made a mitten!!!  And for the best part~ repeat.  You and do the same mitten or do something else entirely different.